Knit Your First Pair of Socks: A Beginner’s Guide
Welcome to KnittingWithAnita.com! If you’re a beginner knitter looking to level up your skills and take on an exciting project, you’ve come to the right place. Today, we’re diving into the world of sock knitting. Don’t worry; it’s not as challenging as it might seem. With a little patience and guidance, you can create cozy, handmade socks that you’ll be proud to wear or share with loved ones.

Materials You’ll Need
Before we jump into the knitting process, let’s gather our supplies:
- Yarn: Choose a soft, worsted-weight yarn for your first pair of socks. It’s easier to work with and knits up more quickly. I wrote about yarn here
- Needles: You’ll need a set of double-pointed needles (DPNs) or a circular needle with a long cable, depending on your preference.
- Stitch markers: These help keep track of the beginning of each round.
- Yarn needle: For weaving in ends.
- Scissors: For cutting the yarn.
Getting Started
- Cast On: To begin, cast on your desired number of stitches. Socks typically require around 64 stitches, but make sure to check your yarn label for recommendations. Divide your stitches evenly between three or four DPNs, or if you’re using a circular needle, place markers between sections of stitches.
- Ribbing: Work in a 1×1 ribbing pattern (k1, p1) for about 2 inches to create a stretchy cuff. This will ensure your socks stay comfortably in place.
The Leg
- Knit the Leg: After the ribbing, knit in the round until your sock leg is the desired length. For a standard crew sock, this can be around 6-7 inches.
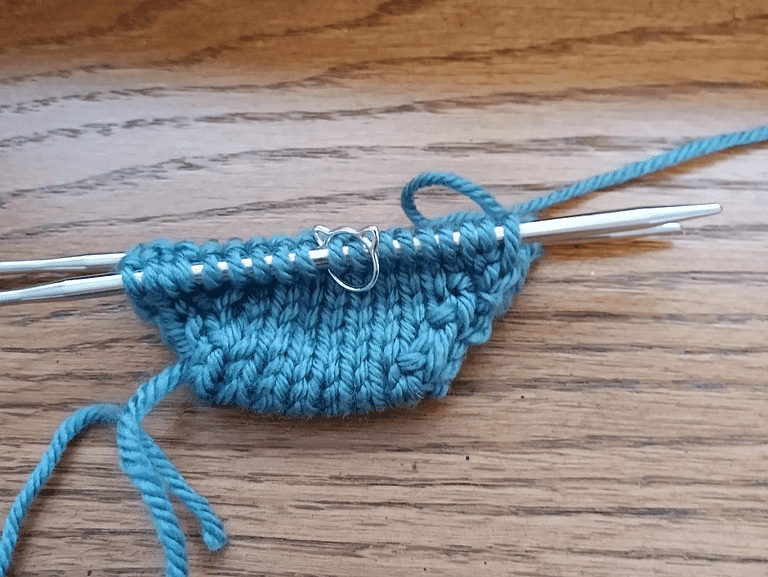
The Heel Flap
- Turn the Heel: This is where sock knitting gets interesting. You’ll work the heel flap back and forth on half of your stitches. Follow these steps: a. Knit the first row.
b. Slip one stitch purlwise, then purl the next stitch. Repeat this until you’ve worked half of your stitches.
c. Turn your work. - Heel Flap Rows: Continue in a slip-one, purl-one pattern for the desired length of your heel flap (usually 2-2.5 inches).
Turning the Heel
- Heel Turn: It’s time to shape the heel. Follow these steps: a. Slip one stitch purlwise.
b. Purl across to the last stitch before the gap.
c. Purl two stitches together.
d. Turn your work. - Heel Turn Rows: Continue this process until you’ve decreased all the stitches and created a small heel cup. You’ll see a gap in the center, which is fine; it’s the gusset.
The Gusset
- Pick Up Stitches: Along the side of the heel flap, pick up stitches (usually the same number you cast on) to close the gap. This is where your sock takes shape.
- Decrease Stitches: Knit across the instep stitches, then decrease one stitch on each needle in the gusset. This helps to shape the sock and ensures a snug fit.
The Foot
- Knit the Foot: Continue knitting in the round until the sock is approximately 2 inches shorter than your desired foot length.
The Toe
- Decrease for the Toe: To shape the toe, you’ll gradually decrease stitches. Here’s how: a. Knit to the last three stitches on the first needle, then knit two together (k2tog) and knit the last stitch.
b. Knit across the second needle.
c. On the third needle, knit the first stitch, then perform a slip-slip-knit (ssk) and knit to the end of the needle. - Repeat these decreases every other round until you have about 16 stitches left. Then, decrease every round until you have 8-12 stitches in total.
- Graft the Toe: To close the toe, use the Kitchener stitch or a similar method. Weave in any remaining ends, and your sock is complete!
That’s it!
Congratulations! You’ve just knit your first pair of socks. Sock knitting can be challenging, but it’s also incredibly rewarding. Each completed pair is a testament to your growing knitting skills. Remember, practice makes perfect, so don’t be discouraged if your first pair isn’t flawless. With time and experience, you’ll master the art of sock knitting and create warm, cozy socks for yourself and your loved ones. Happy knitting!
Remember: Practice makes perfect. Don’t be too hard on yourself. Let me know how it goes for you!
Happy Knitting!
Anita

Very good https://is.gd/tpjNyL
Very good https://shorturl.at/2breu
Awesome https://shorturl.at/2breu
Good https://lc.cx/xjXBQT
Very good https://lc.cx/xjXBQT
Very good https://is.gd/N1ikS2
Awesome https://is.gd/N1ikS2
Good https://is.gd/N1ikS2